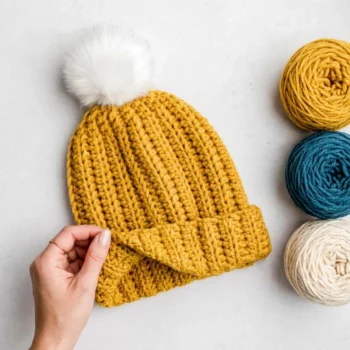
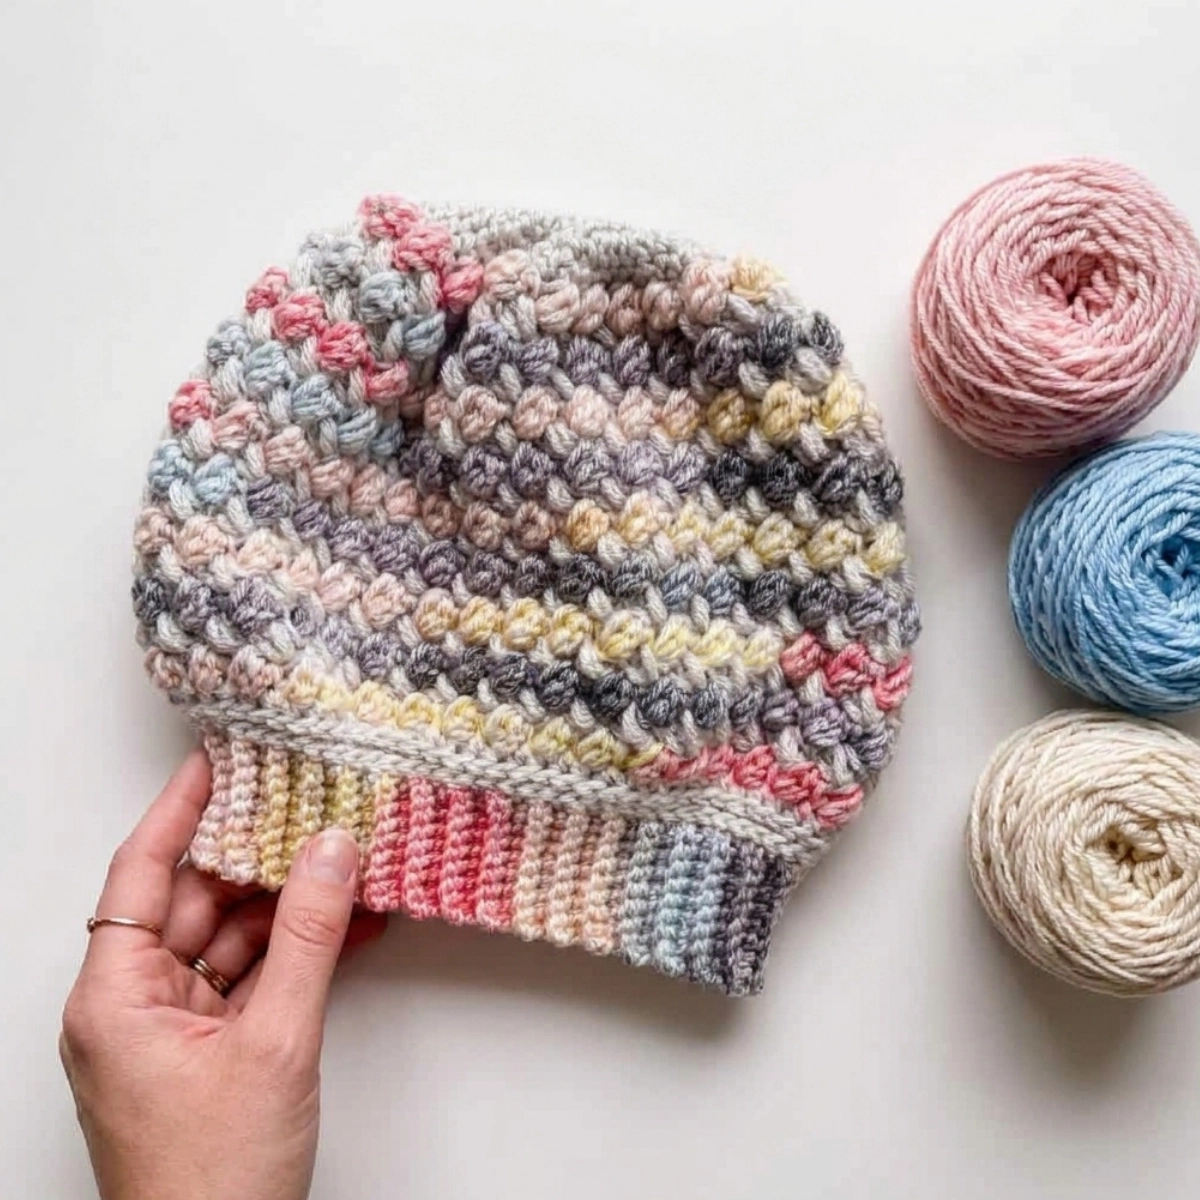
I made this hat to honor someone. Our granddaughter Nina passed away from brain cancer, and I wanted to create something that felt like a tribute — stitches that look woven and locked together, just like the memories we carry of her. That is how the Remember Me Beanie was born. This free puff stitch crochet hat pattern became one of the most meaningful things I have ever made with my hands.
If you have been looking for a textured beanie that goes beyond basic, this is it. The interlocking puff stitch creates a rich, almost woven look that photographs beautifully and feels incredibly cozy to wear. And the fact that it is a free crochet hat pattern makes it even better.
Why You’ll Love This Puff Stitch Crochet Hat
- Worked top down. No seaming the crown. You start right at the top and build the whole hat from there, which makes shaping feel smooth and intuitive.
- Two adult sizes included. Adult small and adult medium are both written out in full, so you can make one for yourself and one as a handmade gift without doing extra math.
- Minimal ends to weave in. Because the two colors are alternated by simply dropping and picking up yarn, you skip the constant fasten-off-and-reattach cycle. Such a time saver.
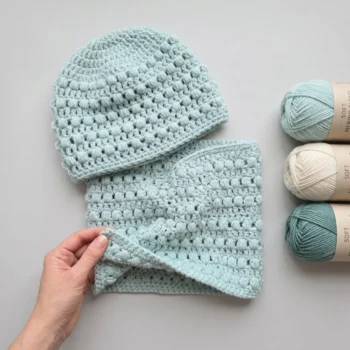
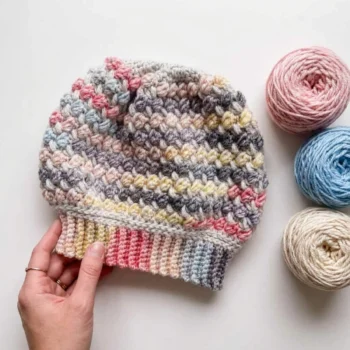
- Beautiful in self-striping yarn too. The interlocking puff stitch plays so well with variegated colorways. I tested it in a self-striping yarn and the result was stunning.
- Beginner-friendly construction. The puff stitch section is a simple one-row repeat once you get the rhythm down. If you have crocheted a beanie before, you can absolutely tackle this one.
Yarn and Materials for the Puff Stitch Crochet Hat
I Love This Yarn from Hobby Lobby is my go-to for hats like this — it is soft, affordable, and the stitch definition is just right for showing off that puff stitch texture. The City Beat print colorway I used for Color B adds movement and depth that makes the hat look almost hand-dyed. Together, the light gray and the print create a pairing that feels both modern and cozy.
Materials:
- Color A: I Love This Yarn (100% acrylic, weight 4/medium, 7 oz / 355 yards) in Light Gray
- Adult Small: 2.0 oz / 101 yards
- Adult Medium: 2.2 oz / 112 yards
- Color B: I Love This Yarn Print (100% acrylic, weight 4/medium, 5 oz / 252 yards) in City Beat
- Adult Small: 2.5 oz / 126 yards
- Adult Medium: 2.5 oz / 126 yards
- Size I (5.5 mm) crochet hook — for crown and main body
- Size H (5.0 mm) crochet hook — for ribbing
- Scissors
- Tapestry yarn needle
- Stitch marker (optional but helpful for continuous rounds)
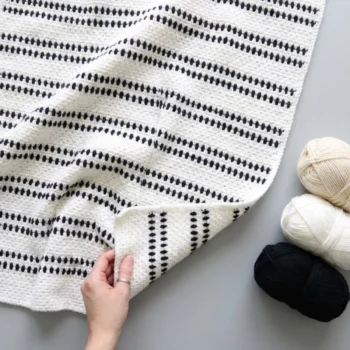
[INTERNAL LINK: suggest anchor text — “worsted weight crochet hat patterns”]
Sizing and Gauge
This free crochet beanie pattern comes in two adult sizes. The adult small finishes at 9 inches tall and 8 inches wide. The adult medium finishes at 9 inches tall and 9 inches wide. Both have a slouchy beanie feel when worn.
Gauge matters here because the crown is worked in continuous rounds and the stitch count determines how the hat fits around the head. My gauge for this pattern is: first 4 rounds of hat = 3.5 inches. If your gauge is tighter, your hat will be smaller. If it is looser, it will be larger. Swatch those first rounds and measure before committing to the full project.
For size adjustments, you can also change yarn weight and hook size. Going up to a bulky yarn will produce a larger hat; going down to a DK weight will produce a smaller size.
Finished Size Reference:
- Adult Small: 9″ height x 8″ width
- Adult Medium: 9″ height x 9″ width
Key Pattern Details at a Glance
- Finished size: Adult Small 9″ x 8″ / Adult Medium 9″ x 9″
- Gauge: First 4 rounds = 3.5″
- Hook size: Size I (5.5 mm) for body / Size H (5.0 mm) for ribbing
- Yarn weight: #4 Medium / Worsted
- Skill level: Intermediate (comfortable with puff stitches and working in the round)
- Construction: Top down, worked in continuous rounds (crown), turned rounds (main body), turned rows (ribbing)
How to Adjust the Size
The stitch count for the adult small is 64 stitches and the adult medium is 72 stitches. To size down for older children or teens, you could work through Round 3 of the crown to reach 32 stitches, then increase in Round 4 to reach somewhere around 42 to 48 stitches and continue into the main body. For the ribbing on a child size, chain 5 instead of 9 and aim for a total hat height of about 7.25 to 7.5 inches from crown to ribbing edge.
[INTERNAL LINK: suggest anchor text — “crochet hat size guide for all ages”]
Crochet Abbreviations (US Terms)
- MC = magic circle
- RS = right side
- WS = wrong side
- ch = chain
- sc = single crochet
- hdc = half double crochet
- sl st = slip stitch
- st(s) = stitch(es)
- sk = skip
- BLO = back loop only
- yo = yarn over
- esc puff = extended single crochet puff stitch (see special stitch definition below)
Special Stitch — esc puff (extended sc puff stitch):
Insert hook into the indicated stitch, yo, pull up a loop, yo, pull through 1 loop — you now have 2 loops on your hook. Insert hook into the same stitch again, yo, pull up a loop, yo, pull through 1 loop — you now have 3 loops on your hook. Yo, insert hook into the same stitch again, yo, pull up a loop to the height of the stitch — 5 loops on hook. Repeat that last step one more time — 7 loops on hook. Yo and pull through all 7 loops. Chain 1 to close the stitch.
This ch-1 closing stitch becomes the anchor for the next round’s puff stitches — they nestle right into those ch-1 spaces and create that beautiful interlocking effect.
[INTERNAL LINK: suggest anchor text — “how to crochet a puff stitch step by step”]
How to Crochet the Puff Stitch Beanie — Step-by-Step Pattern
Pattern written in US crochet terminology. Stitch counts are listed as adult small (adult medium) throughout.
Crown
With Color A and the larger hook (Size I / 5.5 mm), make a magic circle.
Round 1: (RS) Ch 1 (does not count as a stitch), work 8 hdc into the magic circle. Do not join. (8)
Round 2: Work 2 hdc in each stitch around. (16)
Round 3: Work 2 hdc in each stitch around. (32)
Round 4: Work 2 hdc in each stitch around. (64)
For adult small: stop here and advance to the Main Body section.
Round 5 (adult medium only): *2 hdc in next stitch, 1 hdc in each of the next 7 stitches.* Repeat from * to * around. (72) Advance to Main Body.
Note: The crown will not lie perfectly flat as you approach the main body — that is totally normal. It is intended to curve up into the hat shape.
Main Body
Due to the color change and stitch pattern shift, round numbers restart at Round 1 for this section.
Round 1 (all sizes): Sl st to the first stitch of the last crown round. With Color B, turn, ch 1, work esc puff in the same stitch. *Skip the next stitch, esc puff in the next stitch.* Repeat from * to * to the last stitch. Skip the last stitch. Sl st into the first ch-1 to join. Turn. 32 (36) puff stitches.
Round 2: With Color A, ch 1. Work esc puff in the next ch-1 space and in each ch-1 space around. Sl st into the first ch-1 to join. Turn.
Rounds 3 through 21: Repeat Round 2, alternating colors each round. Drop the unused color to the wrong side of the hat rather than fastening off — you will pick it up again as needed.
Round 22: With Color A, ch 1. Work hdc in each stitch and each ch-1 space around. Sl st to the first stitch to join. 64 (72) stitches.
Round 23: Working in the third loop of each hdc stitch from the previous round, ch 1. Work hdc in each stitch around. 64 (72) stitches.
Fasten off Color A.
Ribbing
Turn. With Color B and the smaller hook (Size H / 5.0 mm), chain 9.
Row 1: Sc in the second chain from hook and in each chain across — 8 sc. Now, working in the third loop of the hdc stitches from the last round of the main body, sl st in the next 2 stitches. Turn. (8 sc)
Row 2: Skip the 2 sl sts. Working in the BLO of the sc stitches from Row 1, sc in BLO of each stitch to the end. Turn. (8)
Row 3: Ch 1. Sc in BLO of each stitch to the end. Sl st in the next 2 stitches of the main body. Turn. (8)
Rows 4 through 64 (72): Repeat Rows 2 and 3 until all stitches of the main body have been worked into the ribbing.
Fasten off, leaving a long tail for seaming.
Finishing
Using the mattress stitch, sew the two short edges of the ribbing together to close the brim. Weave in all remaining ends. Add a pom pom to the top if you like — it is optional but it does make the hat even cuter.
[INTERNAL LINK: suggest anchor text — “how to sew a mattress stitch in crochet”]