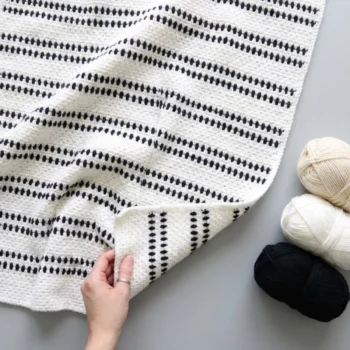
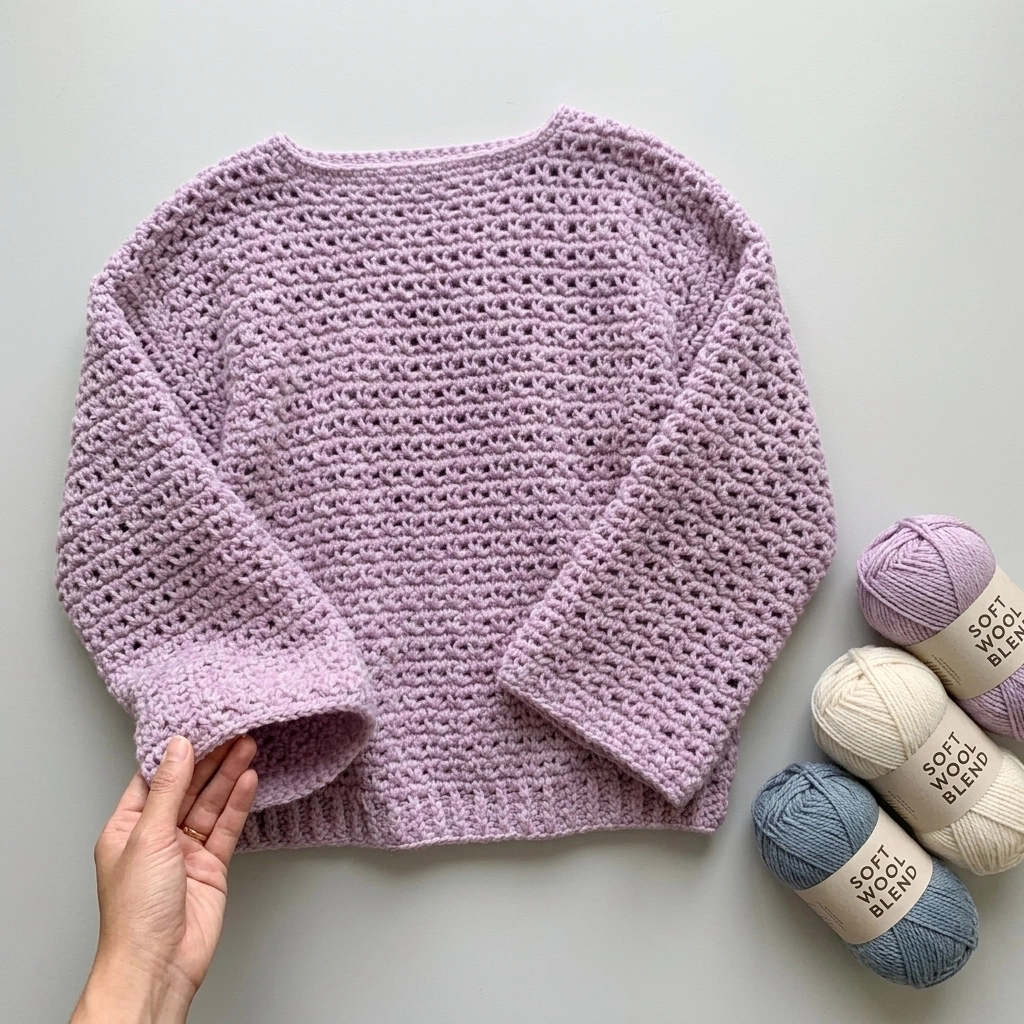
Wanna know how to crochet a sweater super quick? Well, this is the crochet sweater pattern for you. The secret is big yarn and a big hook. It really is that simple. But of course you don’t want to sacrifice the look, so there’s a sweet spot, and I think I’ve found it with this easy crochet sweater pattern. It works up on a bulky weight yarn with an 8mm hook, uses a simple two row repeat, and comes in six sizes from XS to XXL.
This is also a great first sweater project. You finish it quickly, it looks great, and you get that big confidence boost that keeps you coming back for more. And if you’re making it as a gift but don’t have a ton of time, this pattern is perfect for that too.
Materials and Tools
- Bulky weight yarn, #5 (I used Debbie Bliss Dulcie in Lilac), 830(880, 940, 990, 1050, 1100) yards
- 8mm crochet hook
- Scissors
- Yarn needle
- 4 stitch markers
Gauge and Finished Size
Gauge (blocked): 11 stitches x 10.5 rows = 4 inches
Finished measurements (after blocking):
- XS: 17.81″ body width x 20.95″ length
- S: 20″ body width x 20.95″ length
- M: 22.18″ body width x 21.71″ length
- L: 24.36″ body width x 21.71″ length
- XL: 26.54″ body width x 22.47″ length
- XXL: 28.72″ body width x 22.47″ length
Pattern Notes
- This pattern is written in US English terminology.
- Sizes are written as XS(S, M, L, XL, XXL).
- The photos in this pattern show size small.
- This sweater is worked flat in four separate pieces from the bottom up, then sewn together.
- The stitch count is worked in multiples of 2 chains.
- The stitch pattern is a two row repeat (rows 2 and 3).
Abbreviations
- ch = chain
- st = stitch(es)
- sc = single crochet
- sk = skip
- sp = space
- REP = repeat
- RS = right side
- WS = wrong side
- ” = inches
Pattern Instructions
Back Panel
Row 1 (RS): ch 50(56, 62, 68, 74, 80), 1 sc into second ch from hook and each ch across. Total of 49(55, 61, 67, 73, 79) sc.
Row 2 (WS): Turn, ch 1 (do not count as a st), 1 sc into first st, ch 1, sk next st, 1 sc into next st REP from * to * across. Total of 49(55, 61, 67, 73, 79) sts including ch spaces.
Row 3: Turn, ch 1 (do not count as a st), 1 sc into each st and each ch across. Total of 49(55, 61, 67, 73, 79) sc.
REP Row 2 and Row 3 for 26(26, 27, 27, 28, 28) more times. You’ll have a total of 55(55, 57, 57, 59, 59) rows.
At the end of row 55(55, 57, 57, 59, 59), cut the yarn.
Front Panel
Row 1 (RS): ch 50(56, 62, 68, 74, 80), 1 sc into second ch from hook and each ch across. Total of 49(55, 61, 67, 73, 79) sc.
Row 2 (WS): Turn, ch 1 (do not count as a st), 1 sc into first st, ch 1, sk next st, 1 sc into next st REP from * to * across. Total of 49(55, 61, 67, 73, 79) sts including ch spaces.
Row 3: Turn, ch 1 (do not count as a st), 1 sc into each st and each ch across. Total of 49(55, 61, 67, 73, 79) sc.
REP Row 2 and Row 3 for 24(24, 25, 25, 26, 26) more times. You’ll have a total of 51(51, 53, 53, 55, 55) rows. Then follow the shoulder instructions below.
Left Shoulder (as worn)
Pattern continues from the front panel.
Row 52(52, 54, 54, 56, 56): Turn, ch 1 (do not count as a st), 1 sc into first st, ch 1, sk next st, 1 sc into next st REP from * to * 6(7, 8, 9, 10, 11) more times. Total of 15(17, 19, 21, 23, 25) sts including ch spaces.
Row 53(53, 55, 55, 57, 57): Turn, ch 1 (do not count as a st), 1 sc into each st and each ch across. Total of 15(17, 19, 21, 23, 25) sc.
Row 54(54, 56, 56, 58, 58): Turn, ch 1 (do not count as a st), 1 sc into first st, ch 1, sk next st, 1 sc into next st REP from * to * across. Total of 15(17, 19, 21, 23, 25) sts including ch spaces.
Row 55(55, 57, 57, 59, 59): Turn, ch 1 (do not count as a st), 1 sc into each st and each ch across, cut yarn and leave an 18-20″ long tail. Total of 15(17, 19, 21, 23, 25) sc.
Right Shoulder (as worn)
Row 52(52, 54, 54, 56, 56): With your work WS facing up, sk 19(21, 23, 25, 27, 29) sts at the middle for the neckline, add new yarn into next st, then ch 1 (do not count as a st), 1 sc into the same st, ch 1, sk next st, 1 sc into next st REP from * to * across. Total of 15(17, 19, 21, 23, 25) sts including ch spaces.
Row 53(53, 55, 55, 57, 57): Turn, ch 1 (do not count as a st), 1 sc into each st and each ch across. Total of 15(17, 19, 21, 23, 25) sc.
Row 54(54, 56, 56, 58, 58): Turn, ch 1 (do not count as a st), 1 sc into first st, ch 1, sk next st, 1 sc into next st REP from * to * across. Total of 15(17, 19, 21, 23, 25) sts including ch spaces.
Row 55(55, 57, 57, 59, 59): Turn, ch 1 (do not count as a st), 1 sc into each st and each ch across, cut yarn and leave an 18-20″ long tail. Total of 15(17, 19, 21, 23, 25) sc.
Sleeve Panels (Make 2)
Row 1 (RS): ch 44(46, 50, 52, 56, 58), 1 sc into second ch from hook and each ch across. Total of 43(45, 49, 51, 55, 57) sc.
Row 2 (WS): Turn, ch 1 (do not count as a st), 1 sc into first st, ch 1, sk next st, 1 sc into next st REP from * to * across. Total of 43(45, 49, 51, 55, 57) sts including ch spaces.
Row 3: Turn, ch 1 (do not count as a st), 1 sc into each st and each ch across. Total of 43(45, 49, 51, 55, 57) sc.
REP Row 2 and Row 3 for 18 more times. You’ll have a total of 39 rows. All sizes are the same sleeve length.
At the end of row 39, cut the yarn and leave a 30-40″ long tail.
Note: If you want shorter sleeves, repeat rows 2 and 3 fewer times. If you want longer sleeves, just keep repeating until you reach your desired length.
Joining the Pieces Together
Sew the Back and Front Panels Together
Take the back and front panels and place them with the right side facing down. Sew on the wrong side using the tails you left earlier. Sew 15(17, 19, 21, 23, 25) sts of the front and back panel together at each shoulder seam. Use whichever seaming method you prefer. Both shoulder seams are done the same way.
Sew the Sleeves to the Main Panel
With your main panel right side facing down, place your sleeves right side facing down and start sewing on the wrong side using the tail. The shoulder seam of the main panel should sit in the middle of the sleeve panel, even on both sides.
Sew the Sweater Together
Fold your sweater in half at the shoulder seam with the right sides facing each other. Cut a new strand of yarn 60-70″ long. This needs to be long enough to sew the full side seam and the sleeve seam in one go. Start sewing from the bottom up along the side seam until you reach the armpit, then continue sewing the sleeve seam all the way to the end of the sleeve. Weave in all ends.
Neckline Edge
With your sweater right side facing out, you’ll crochet on the right side in the round. Add new yarn at the shoulder, then ch 1 (do not count as a st), 1 sc into the same st, then make 1 sc into each st and each sp all the way around. Cut the yarn and weave in all ends.
If you’d like a taller neckline edge, just keep adding more rounds of sc until you’re happy with it.
Tips
The yarn choice really does make a big difference with this sweater. I used a bulky #5 weight yarn and it is everything you want: comfy, cozy, and incredibly soft. The color range available in bulky yarn these days is gorgeous, so have fun picking yours.
Blocking the finished sweater is important. It opens up the stitch pattern beautifully and helps everything sit flat. Your gauge measurements listed above are after blocking, so make sure you swatch and block your gauge swatch before you start.
Leave your yarn tails nice and long when you cut them during construction. You’ll need those tails for seaming, so skimping on length here will only make things harder later.
This crochet sweater pattern is very easy to customize. Need a longer body? Just add more row repeats before you start the shoulders. Want shorter sleeves? Fewer repeats on the sleeve panels. The two row repeat is so straightforward that adjusting is no trouble at all.
If you’re crocheting this sweater for the first time, place your four stitch markers at the shoulder points before you start seaming. It helps you line everything up properly and takes a lot of the guesswork out of assembly.
Frequently Asked Questions
What yarn weight do I use to crochet this sweater? This pattern uses a #5 bulky weight yarn. A bulky yarn paired with an 8mm hook is what makes this sweater work up so quickly, so I’d recommend sticking to that weight to get the best results.
What skill level is this crochet sweater pattern? This is an easy level pattern. The stitch repeat is just two rows and uses only basic stitches, single crochet and chain spaces, making it a great first sweater even for newer crocheters.
How many yards of yarn do I need to crochet a sweater with this pattern? You’ll need approximately 830(880, 940, 990, 1050, 1100) yards depending on your size, from XS through to XXL.
Can I adjust the length of this crochet sweater pattern? Yes, and it’s very easy to do. Since the body and sleeves are worked in a simple two row repeat, you can add or subtract rows to get exactly the length you want.
Do I need to block this crochet sweater? Yes, blocking is recommended. The finished measurements listed in this pattern are all after blocking. Blocking opens up the stitch pattern and gives the sweater a much more polished, professional finish.
I share daily crochet inspiration on Pinterest. Save this article to your Pinterest boards so you can come back to it whenever you are ready to start.