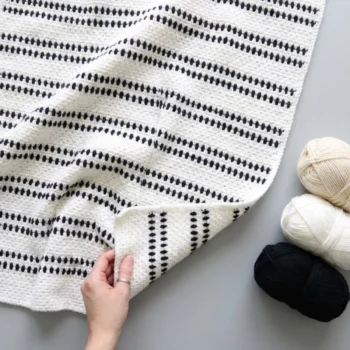
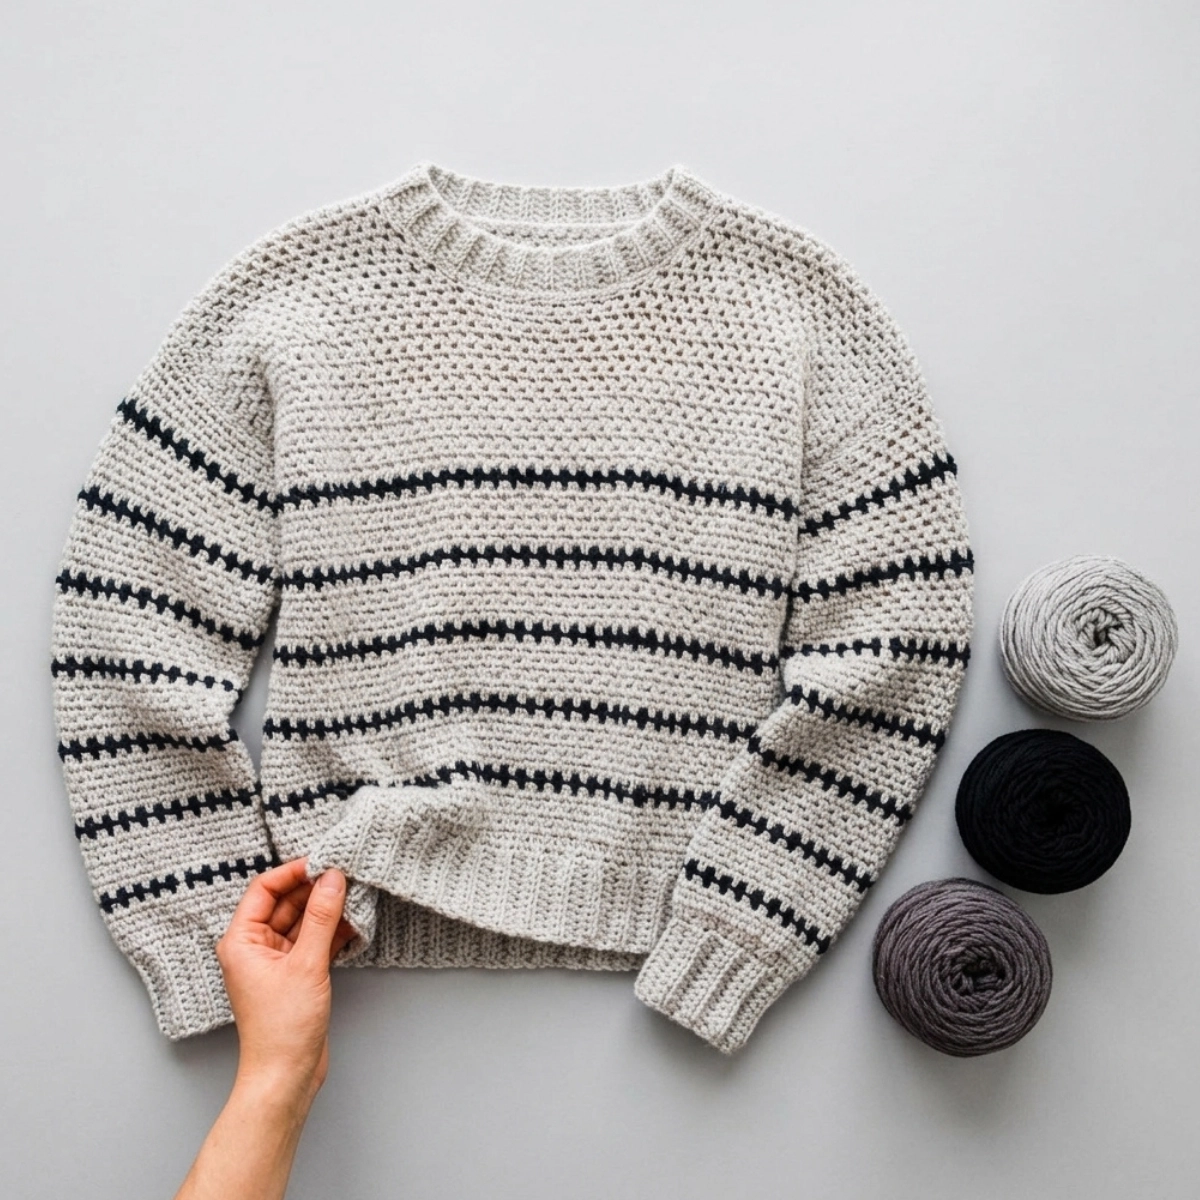
September is honestly my favourite month for crochet, and this Breton Stripe Sweater has become one of my most-loved makes. I wanted a long pullover that was light enough to layer but still had that cosy, put-together feel. The stripe details give it a classic French Bateau look, and the linen stitch body has the most incredible drape. If you’ve been searching for an easy crochet stripe sweater pattern that works up beautifully in any colour combination, this one is for you.
Materials and Tools
- Yarn: WeCrochet Andean Treasure, Sport/Fine (2), 100% Baby Alpaca, 100m/50g (110yds/1.75oz)
- MC (Main Colour, finley heather): approx. 495(545, 600, 665, 745)(810, 870, 980, 1035)g
- CC (Contrasting Colour, midnight heather): approx. 65(70, 70, 75, 80)(85, 90, 95, 100)g
- Total yarn: approx. 560(615, 670, 740, 820)(890, 960, 1075, 1135)g
- 5.5mm (US H/I) Crochet Hook (for body and sleeves)
- 6mm (US J) Crochet Hook (for ribbing)
- Darning Needle
- Scissors
- 2 Stitch Markers
A note on yarn substitution: the Andean Treasure is classified as Sport/Fine (2), but it crochets closer to a thick DK/Light (3) or a very thin Worsted/Medium (4). If you substitute, look for something with great drape. A stiff, tightly spun yarn will make the sweater look stiff and awkward no matter how soft the fibre is. Baby alpaca and merino are both great choices.
Gauge and Finished Size
Gauge: 18 stitches wide x 19 rows tall = 10cm/4″ square in linen stitch with 5.5mm hook.
Please check your gauge before starting. Getting gauge right on a sweater makes a real difference to how it fits.
Sizes: XS (S, M, L, XL)(2XL, 3XL, 4XL, 5XL)
Measurements (inches):
| XS | S | M | L | XL | 2XL | 3XL | 4XL | 5XL | |
|---|---|---|---|---|---|---|---|---|---|
| To fit Bust | 30 | 34 | 38 | 42 | 46 | 50 | 54 | 58 | 62 |
| Back Width | 17.5 | 19.5 | 21 | 23 | 25 | 27 | 28.5 | 30.5 | 32.5 |
| Armhole | 5.5 | 6 | 6.5 | 7 | 7.5 | 8 | 8.5 | 9 | 9.5 |
| Sleeve Length | 14.5 | 15 | 15 | 15 | 16 | 16 | 16 | 16.5 | 16.5 |
| Length | 23 | 23 | 23.5 | 24 | 25 | 26 | 26.5 | 27 | 27 |
Measurements (cm):
| XS | S | M | L | XL | 2XL | 3XL | 4XL | 5XL | |
|---|---|---|---|---|---|---|---|---|---|
| To fit Bust | 76 | 86 | 96 | 106 | 117 | 127 | 137 | 147 | 158 |
| Back Width | 45 | 50 | 54 | 58 | 63 | 68 | 72 | 78 | 83 |
| Armhole | 14 | 15 | 16 | 18 | 19 | 20 | 22 | 23 | 24 |
| Sleeve Length | 37 | 38 | 38 | 38 | 40 | 40 | 40 | 42 | 42 |
| Length | 59 | 59 | 60 | 62 | 64 | 66 | 67 | 69 | 69 |
The sample is a size Small shown on a 5’3″ model with a 32″ bust.
Pattern Notes
- The sizing guide follows XS (S, M, L, XL)(2XL, 3XL, 4XL, 5XL). Numbers in the pattern appear in the same order. If there is only one number, it applies to all sizes.
- “SC 10” means SC into the next 10 stitches.
- The turning chain (ch 1) does NOT count as a stitch. Otherwise ch 1 does count as a stitch.
- Total stitch counts are shown between < >.
- This pattern uses US crochet terms.
- The majority of the sweater is worked in the Linen Stitch (also called the Moss Stitch). It follows a 2-row repeat. The two rows are referred to as LINEN A and LINEN B throughout the pattern.
- The sweater is constructed from 5 pieces: front panel, back panel, 2 sleeves, and neckline ribbing.
- The body panels and sleeves are crocheted from the bottom up. The ribbing is crocheted lengthways, and the body and sleeves are worked directly onto the long edge of the ribbing. The neckline ribbing is crocheted separately and sewn on at the end.
- All pieces are sewn together with the right side (RS) on the inside and the wrong side (WS) facing outward.
- The sample has 9 thin stripes across the body and a solid MC portion at the tops of the shoulders. Follow the stripe instructions to recreate this look.
- You can alter the length of the sweater, stripe placement, and stripe thickness. Keep in mind that more or thicker stripes will require more CC yardage and less MC.
Skill Level: Easy+
Abbreviations
- Ch = Chain
- SC = Single Crochet
- SC2tog = Single Crochet 2 Stitches Together
- HDC = Half Double Crochet
- BLO = Back Loop Only
- ch-sp = Chain Space
- St(s) = Stitch(es)
- Rep = Repeat
- Sk = Skip
- RS = Right Side
- WS = Wrong Side
- MC = Main Colour
- CC = Contrasting Colour (stripes)
- SM = Stitch Marker
Special Stitches
Linen Stitch (Moss Stitch)
The linen stitch is the main stitch used throughout this Breton Stripe Sweater crochet pattern. It is made up of single crochets and chains and creates a beautiful fine mesh texture with incredible drape.
Foundation Chain: Chain an even number of chains.
Row 1: SC in 2nd ch from hook, *ch 1, sk 1 ch, SC; rep from * until end, turn.
Row 2 (LINEN A): Ch 1, SC in 1st st, SC in ch-sp, *ch 1, sk 1 st, SC in ch-sp; rep from * until last st, SC in last st, turn.
Row 3 (LINEN B): Ch 1, SC in 1st st, *ch 1, sk 1 st, SC in ch-sp; rep from * until 2 sts left, ch 1, sk 1 st, SC in last st, turn.
Repeat Rows 2 and 3 until desired length.
Back Loop Half Double Crochet Ribbing (BLO HDC Ribbing)
This ribbing is used for the body hem, sleeve cuffs, and neckline. Working in the back loop only creates that stretchy, ribbed texture. Because it is so stretchy, the ribbing should be slightly smaller than the opening it is attached to. It will stretch to fit and lie flat once worn.
Breton Stripe Sweater Pattern Instructions
Back Panel
Back Panel Ribbing
Foundation Chain: With MC and 6mm (US J) hook, ch 12.
Row 1: HDC in 2nd ch from hook, HDC in each st until end, turn. <11>
Row 2: Ch 1, BLO HDC 10, HDC in last st, turn. <11>
Repeat Row 2 until Row 43(47, 51, 55, 59)(63, 67, 73, 77).
Do not fasten off. Swap the 6mm hook for the 5.5mm hook. You will now work along the long edge of the ribbing.
Row 1: Ch 1, SC in each of first 3 rows, *ch 1, SC in next row; rep from * until 2 rows left, SC in last 2 rows, turn. <81(89, 97, 105, 113)(121, 129, 141, 149)>
Row 2: Ch 1, SC 2, *ch 1, sk 1 st, SC in next st; rep from * until last st, SC in last st, turn. <81(89, 97, 105, 113)(121, 129, 141, 149)>
Row 3 (LINEN B): Ch 1, SC in 1st st, *ch 1, sk 1 st, SC in ch-sp; rep from * until 2 sts left, ch 1, sk 1 st, SC in last st, turn. <81(89, 97, 105, 113)(121, 129, 141, 149)>
Row 4 (LINEN A): Ch 1, SC in 1st st, SC in ch-sp, *ch 1, sk 1 st, SC in ch-sp; rep from * until last st, SC in last st, turn. <81(89, 97, 105, 113)(121, 129, 141, 149)>
Solid Sweater Back Panel
Repeat Linen B and Linen A rows until Row 100(100, 102, 106, 110)(112, 114, 118, 118). <81(89, 97, 105, 113)(121, 129, 141, 149)>
You can add or remove rows to adjust the sweater length. Fasten off.
Stripe Sweater Back Panel
For the striped version, continue after Row 4 as follows:
Row 5: As Linen B. Row 6: As Linen A. Row 7: With CC, rep Linen B. Row 8: As Linen A. Row 9: As Linen B. Row 10: As Linen A. Row 11: As Linen B. Row 12: As Linen A. Row 13: As Linen B. Row 14: As Linen A. Row 15: With CC, rep Linen B.
Repeat Rows 8 through 15 until Row 71. <81(89, 97, 105, 113)(121, 129, 141, 149)>
Do not fasten off. With MC only, continue in Linen A and Linen B until Row 100(100, 102, 106, 110)(112, 114, 118, 118).
Fasten off.
Front Panel
Repeat the Back Panel instructions (ribbing and linen stitch body) until Row 90(90, 92, 96, 100)(102, 104, 108, 108). <81(89, 97, 105, 113)(121, 129, 141, 149)>
If you adjusted the length of your back panel, work until you are 10 rows short of your back panel total. Do not fasten off. You will now work the shoulder shaping.
Shoulder Shaping Side 1
Counting from your crochet hook, skip 32(36, 40, 44, 48)(52, 56, 62, 66) sts. Place a SM in the next stitch. The stitch marker should be in a ch-sp, not a SC.
Row 1: Ch 1, SC in 1st st, ch 1, sk 1 st, *SC in ch-sp, ch 1, sk 1 st; rep from * until 2 sts from the SM, SC2tog, turn. <31(35, 39, 43, 47)(51, 55, 61, 65)>
Row 2: Ch 1, sk 1st st, SC in ch-sp, *ch 1, sk 1 st, SC in ch-sp; rep from * until last st, SC in last st, turn. <30(34, 38, 42, 46)(50, 54, 60, 64)>
You can place a SM in the first stitch if you need help spotting the beginning of the row.
Row 3: Ch 1, SC in 1st st, ch 1, sk 1 st, *SC in ch-sp, ch 1, sk 1 st; rep from * until 2 sts left in row, SC2tog, turn. <29(33, 37, 41, 45)(49, 53, 59, 63)>
Row 4: As Row 2. <28(32, 36, 40, 44)(48, 52, 58, 62)>
Row 5: As Row 3. <27(31, 35, 39, 43)(47, 51, 57, 61)>
Row 6: As Row 2. <26(30, 34, 38, 42)(46, 50, 56, 60)>
Rows 7 to 10: Ch 1, SC, *ch 1, sk 1 st, SC in ch-sp; rep from * until last st, SC in last st, turn. <26(30, 34, 38, 42)(46, 50, 56, 60)>
Fasten off.
Shoulder Shaping Side 2
Counting from the stitch marker, skip 16 sts. Insert your hook into the next stitch. The hook should be in a SC. Pull up a loop.
Row 1: Ch 1, SC2tog, *ch 1, sk 1 st, SC in ch-sp; rep from * until 2 sts left, ch 1, sk 1 st, SC in last st, turn. <31(35, 39, 43, 47)(51, 55, 61, 65)>
You can place a SM in the SC2tog to help track the beginning of the row.
Row 2: Ch 1, SC 2, *ch 1, sk 1 st, SC in ch-sp; rep from * until last ch-sp, turn. <30(34, 38, 42, 46)(50, 54, 60, 64)>
Do not crochet into the last stitch of the row (the SC2tog).
Row 3: As Row 1. <29(33, 37, 41, 45)(49, 53, 59, 63)>
Row 4: As Row 2. <28(32, 36, 40, 44)(48, 52, 58, 62)>
Row 5: As Row 1. <27(31, 35, 39, 43)(47, 51, 57, 61)>
Row 6: As Row 2. <26(30, 34, 38, 42)(46, 50, 56, 60)>
Rows 7 to 10: Ch 1, SC 2, *ch 1, sk 1 st, SC in ch-sp; rep from * until 2 sts left, ch 1, sk 1 st, SC in last st, turn. <26(30, 34, 38, 42)(46, 50, 56, 60)>
Fasten off.
Sleeves
Make 2.
Sleeve Ribbing
Foundation Chain: With MC and 5.5mm (US H) hook, ch 12.
Row 1: HDC in 2nd ch from hook, HDC in each st until end, turn. <11>
Row 2: Ch 1, BLO HDC 10, HDC in last st, turn. <11>
Repeat Row 2 until Row 21(21, 23, 23, 25)(25, 27, 27, 29).
Do not fasten off. You will now work along the long edge of the ribbing.
Row 1: Ch 1, SC in 1st row, *ch 1, SC in next row; rep from * until end, turn. <41(41, 45, 45, 49)(49, 53, 53, 57)>
Row 2: Ch 1, SC in 1st st, rep [ch 1, SC in next st] 5(7, 7, 9, 11)(13, 13, 15, 15) times, *ch 1, sk 1 st, SC in ch-sp; rep from * until 5(7, 7, 9, 11)(13, 13, 15, 15) sts left, rep [ch 1, SC in next st] until last st, turn. <51(55, 59, 63, 71)(75, 79, 83, 87)>
Solid Sweater Sleeve
Repeat Linen A and Linen B rows until sleeve measures 37(38, 38, 38, 40)(40, 40, 42, 42)cm / 14.5(15, 15, 15, 16)(16, 16, 16.5, 16.5)”. <51(55, 59, 63, 71)(75, 79, 83, 87)>
Fasten off.
Stripe Sweater Sleeve
Row 3: As Linen A. Row 4: As Linen B. Row 5: As Linen A. Row 6: As Linen B. Row 7: With CC, rep Linen A. Row 8: As Linen B. Row 9: As Linen A. Row 10: As Linen B. Row 11: As Linen A. Row 12: As Linen B. Row 13: As Linen A. Row 14: As Linen B. Row 15: With CC, rep Linen A.
Repeat Rows 8 through 15 until sleeve measures 37(38, 38, 38, 40)(40, 40, 42, 42)cm / 14.5(15, 15, 15, 16)(16, 16, 16.5, 16.5)”. <51(55, 59, 63, 71)(75, 79, 83, 87)>
Fasten off.
Fold the sleeve in half lengthways and whip stitch the long edge of the sleeve together.
Assembly
Lay the front panel on top of the back panel. Whip stitch the shoulder seams together. Whip stitch up the sides of the body panels, leaving a gap for the sleeves. Whip stitch the top of each sleeve to the body.
All pieces are sewn with the RS on the inside and WS facing outward.
Neckline Ribbing
Foundation Chain: With MC and 5.5mm (US H) hook, ch 7.
Row 1: HDC in 2nd ch from hook, HDC in each st until end, turn. <6>
Row 2: Ch 1, BLO HDC 5, HDC in last st, turn. <6>
Repeat Row 2 until the ribbing measures approximately 43cm/17″.
The ribbing should be slightly smaller (1 to 2cm / 0.5 to 1″) than the neck opening. It will stretch to fit and relax after a few wears. If the ribbing is too long it will ruffle and stick up around your neck. If it’s too short it will pucker and pull on the neckline stitches.
I always recommend pinning the ribbing to the neckline and trying the sweater on before sewing it into place. Once you are happy with the fit, whip stitch the ribbing evenly around the open edge of the neckline. Sew the short edges of the ribbing together. Weave in all ends.
And that’s it! Your Breton Stripe Sweater is done.
Tips for Crocheting This Stripe Sweater
Yarn matters more than you think. For a sweater like this Breton Stripe Sweater, a yarn with natural drape is everything. Baby alpaca, merino, and similar fibres work beautifully. If you use a stiff or tightly spun acrylic, the linen stitch panels will look and feel quite stiff.
Always check your gauge. Even if you are an experienced crocheter, a quick gauge swatch before starting a sweater-sized project can save a lot of frustration. A small difference in tension can add or remove several centimetres across the width.
For the stripes, you can make them as thick or as thin as you like. The sample uses thin 2-row stripes for a classic Breton look. If you want bold, thick stripes you can repeat the CC rows for longer before switching back. Just keep in mind that more CC means more yardage in that colour.
When it comes to the ribbing, BLO HDC ribbing is very stretchy. Make the ribbing slightly smaller than the opening it attaches to. It will stretch to fit and lie flat against the body when worn.
Crocheting the neckline ribbing after assembling the sweater gives the neatest result. It lets you check the fit before committing to the length.
Frequently Asked Questions
What skill level is the Breton Stripe Sweater crochet pattern? This pattern is rated Easy+. It is suitable for crocheters who know the basics and are ready to try their first or second garment project. The main stitch is the linen stitch, which follows a simple 2-row repeat once you get the hang of it.
Can I substitute the yarn in this crochet stripe sweater pattern? Yes, but choose a yarn with good drape. The WeCrochet Andean Treasure used in the sample is 100% baby alpaca and has a very airy, fluid quality. A soft merino DK or a thin worsted with natural fibre content would work well. Avoid stiff or very tightly spun yarns as they will affect the drape and fit.
What is the linen stitch used in this sweater pattern? The linen stitch (also called the moss stitch) is made up of single crochets and chain spaces worked in a 2-row repeat. It creates a fine, slightly mesh-like texture that is lightweight and very drapey. It is beginner-friendly once you understand the row structure.
Can I make this sweater without stripes? Absolutely. You can work the entire sweater in the MC for a solid colour version, or do a simple colour block by switching colours at a certain row. The stripe instructions are optional, and all the construction steps remain the same.
How do I get the neckline ribbing to lie flat? The key is to make the ribbing slightly shorter than your neckline opening. BLO HDC ribbing is very stretchy, so it will stretch to fit. If the ribbing is too long it will ruffle. If it is too short it will pull. I always recommend pinning it in place and trying the sweater on before you sew it down.
I share daily crochet inspiration on Pinterest. Save this article to your Pinterest boards so you can come back to it whenever you are ready to start.